Tag Archives: vegetable

Carrot Gardening Information

Carrot Gardening Information for the Gardener

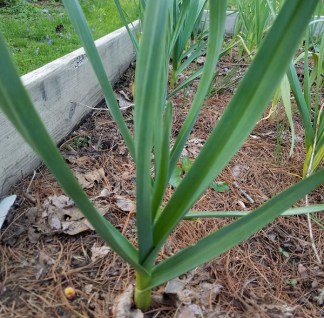
Carrots belong to the Apiaceae family, which also includes dill, cilantro, parsley, and celery. Though they’re biennial plants, carrot gardening typically cultivates the root as annuals, harvesting the long taproot at the end of the first season. If allowed to continue growing, they will flower and set seeds during the second year. Carrots produce a rosette of leaves above the ground and a long, fleshy taproot below the soil. Depending on the variety, the root can grow between 2 to 20 inches long, with a diameter of up to 2 inches. During the first year, the foliage typically reaches a height of around 12″. During the second year, when it flowers, the plant can grow as tall as 59 inches.

Types And Varieties

Besides being crunchy and tasty, carrots are nutritious vegetables. They are a good source of fibers, beta carotene, potassium, and antioxidants. Many different types of carrots exist, ranging in color, sizes, and shapes. Besides the orange-colored carrots you’re familiar with, yellow, white, red, and purple carrots also exist.

Common Varieties Of Carrots

  • Deep Purple Hybrid – This 7 to 8 inches long carrot reaches maturity in 75 to 80 days and comes in a deep purple color to make a bright addition to salads and dips. Though the unique hue runs all the way through the root, it will fade a bit when cooked, which is why it’s usually consumed raw. 
  • Little Fingers – Maturing earlier than others, this variety can be harvested in only 55 days. The miniature roots, up to 4 inches in length, feature an attractive orange color and are packed with sweetness.
  • Touchon – This is a sweet and tender heirloom variety that matures earlier than most others and is great for salads. The classic orange roots take about 65 days to mature, reaching a length of 6 inches.
  • Solar Yellow It’s a beautiful yellow heirloom carrot, sweet and crisp in flavor. They grow to about 7 inches in length, maturing in about 60 to 70 days from germination.

Carrots yield about 7 to 10 pounds for every 10-foot row. Grow about 30 plants for each person spacing them 1.5 to 2 inches apart in rows spaced at least 1 foot apart.

Temperature and Timing For Growing Carrots

Carrots are cool-season crops that are best grown in early spring and late fall. Day temperatures of 75°F and night temperatures of 55°F are best for their growth. You can sow the seeds outdoors 3 to 5 weeks before the last spring frost for a spring crop. Successive plantings can be continued until late spring for a continued harvest in the summers. For a fall crop, you can start planting 10 weeks before the first fall frost.

Sun Exposure And Soil Requirements

Though they can tolerate partial shade, carrots grow best when exposed to full sunlight. Make sure they get about 6 to 8 hours of direct sunlight each day.

Loose soil, sandy or loamy, is very important for carrot gardening to grow long straight roots. Work the soil before planting the seeds and remove any stones and debris from the area. Amend it with plenty of organic matter and compost.

How To Plant Carrots

Carrot gardening starts by sowing the seeds directly in the garden, 3 to 5 weeks before the last spring frost. Since they have long taproots, it’s recommended not to disturb them by transplanting. They are best planted in their permanent spot right from the start. Sow the seeds ¼ inch deep, spaced 1 to 2 inches apart in rows that are at least a foot apart. You can sow them closer together and thin them to 3 inches apart once they are around 4 inches tall. Cut off the top with scissors instead of pulling out the roots since they may damage the surrounding roots.

You’ll have to wait for around 2 to 3 weeks to see sprouting. Keep the soil moist during germination by sprinkling water frequently. Spread a thin layer of vermiculite over the soil surface to prevent it from forming a crust. Since the carrot seeds are very small, they’ll have a harder time sprouting if the soil forms a hard crust over them.

Provide about 1 inch of water per week during the first few weeks of development, increasing to about 2 inches per week as the roots approach maturity. Water the carrots deeply each time the soil dries out to a depth of 3 inches (you can check with your finger). Carrots follow the moisture into the soil, so if you water them deeply and less often instead of frequent, shallow watering, you’ll find long straight roots.

Keep the bed well weeded, but snip the weeds instead of pulling them so you don’t disturb the developing roots. Once the tops are 3 to 4 inches tall, you can fertilize the crop with a low-nitrogen fertilizer, such as 5-15-15. Excess nitrogen will promote green growth instead of favoring the roots.

Harvest

At the end of a successful carrot gardening season, you can expect a bright, flavorful harvest. Here’s how to harvest carrots:

  • Harvest the roots as soon as they reach the expected size. If you allow them to grow too big, they’ll start losing their flavor and will grow tougher.
  • Gently push away some dirt from the top of one of the carrots to check the size. Shey should be at least ½ an inch in diameter at the time of harvest. However, the exact size varies with the variety.
  • When growing carrots in spring, make sure you harvest them before the temperatures soar. High temperatures can turn the roots too fibrous.
  • For a fall harvest, let them stay in the ground, exposed to one or more frosts since it will enhance the flavors. If you want to keep them in the ground for harvesting later, spread several inches of mulch over them to keep them well protected.
  • When it’s time to harvest, loosen the earth around them and lift them gently out of the soil with your hands, taking care not to break the roots.

Storing

Cut off the excess foliage, leaving ½ inch attached to the top. Wash away the dirt and wrap it unpeeled in damp paper towels before keeping them in the refrigerator. Stored in this way, fresh carrots can last up to a month.

You can also keep them in the ground through the winters and dig them as needed unless the ground freezes over. However, if left in the ground all winter long, be sure to harvest them before spring when the tops resume new growth.

If the ground is expected to freeze during the winters, you can keep the carrots in the ground mulched with a 12 to 18-inch layer of shredded leaves, hay, or straw.

Pests And Diseases

Pests

  • Carrot rust fly is a common problem for carrot crops growing in temperate regions. The larvae dig through the roots eating the carrot and leaving unsightly holes on the surface. Install row covers at the time of planting before the adult fly has a chance to lay eggs around the plants.
  • Aphids are soft-bodied insects that can usually be spotted on the underside of leaves and are green or yellow in color. They secrete a sugary substance that promotes the growth of mold on plants. If the infestation is limited to a few leaves or shoots, you can prune them out to prevent spread to the surrounding shoots and plants. Insecticidal soaps can also be used to control spread.

Diseases

  • Alternaria blight is a fungal disease that appears as brown water-soaked lesions on leaves’ edges. Initially, the older leaves are affected, curling and eventually dying as a result. If the disease hits the crop at an early stage, roots are unable to reach maturity. Grow resistant varieties and avoid soaking the leaves when watering the plants to protect the plants from this disease.

With this article, you are ready to start a successful carrot growing season!

Eggplant Gardening

Eggplant Gardening

Eggplant gardening growing black beauty

Eggplant, Solanum melongena, is a perennial from the nightshade family, Solanaceae, and is cultivated in tropical and subtropical climates throughout the world. It comes from the same family as potatoes, tomatoes, and several other poisonous nightshades. Eggplant is native to Southeast Asia and a staple in Mediterranean cuisine since ancient times. It’s typically grown as an annual and can reach a height of 1.5 m, giving large, slightly lobed leaves and purple flowers. The fruit is a large, egg-shaped deep purple berry with smooth skin and several small seeds. Though the fruit, commonly consumed as a vegetable, is typically purple, you can also find it in other colors.

Types & Varieties of Eggplant

Other than the large, oblong, purple eggplants you find in grocery stores, there are several other varieties too. They come in unique shapes and colors. Besides the deep purple color that you’re familiar with, red, pink, yellowish, and white eggplants also exist.

Common Varieties of Eggplant:

Black BeautyThe variety matures in 72 to 85 days, producing large, oval fruits with purplish-black skin that hold color and texture well after being harvested. It’s an heirloom variety that grows up to 24 to 30 inches tall, bearing 4 to 6 fruits per plant.

Little Fingers – Maturing in as little as 68 days, this variety bears slim, 4 to 6 inches long fruits with glossy dark purple skin and a sweet, delicate flavor.

Easter Egg – Maturing in 52 to 65 days, it bears small, white fruits in the shape and size of an egg.

Hansel – Harvested in about 55 days, this cultivar produces long, thin purple fruits that appear in clusters on the branches. It’s best picked when the fruits are just about 3 inches long, though they can grow up to 10 inches long when fully mature.

For a self-sufficient garden, grow 1 to 2 eggplant plants per person, spacing them 24 to 30 inches apart in rows that are at least 3 feet apart.

Temperature and Timing for Growing Eggplant

Eggplant is a warm-weather crop and requires at least 5 months of warm temperatures for proper fruit development. The ideal temperatures to grow eggplant lie between 70 and 85°F. If the weather is cooler, the growth will slow down. They’re typically grown as a spring crop, so they can grow through the warm summers.

Sun Exposure and Soil Requirements

Eggplant grows best in full sun. Make sure they receive at least 6 hours of undisturbed sunlight each day. If you have a spot that receives more sunlight, that’s even better.

Sandy loam or loam soil is best for eggplant. Make sure it’s well-drained, rich in organic matter, and has a pH between 5.8 and 6.5 for optimal growth.

How to Plant Eggplant

Eggplant gardening starts with planting the seeds indoors 8 to 9 weeks before the last spring frost. Start the seeds in seedling trays or peat pots filled with a good seed starting mix. Set the seeds ¼ inch deep in the soil and spray the soil with water to moisten it. Place the pots over a heating mat, making sure the temperature is between 75 to 85°F for optimal germination.

eggplant flowers

Seedlings will sprout in a week or two. As soon as you see sprouting, place the pot at a window that receives plenty of sunlight. Thin the seedlings to 2 to 3 inches apart once they have at least two sets of leaves.

Wait until after the last frost of the spring to transplant the seedlings outdoors. Outdoor temperatures should be consistently above 50°F when you plan on transplanting the seedlings into the garden. Amend the garden soil with lots of organic matter before planting the seedlings.

Harden off the seedlings in about a week before you set them in the garden bed permanently. If you want to skip starting the seeds indoors, you can purchase 6 to 8-weeks old transplants from the nursery right before planting in the garden.

Space the transplants 24 to 30 inches apart in rows spaced 3-feet apart. Stake the plants at the time of planting, so the plants have support as they grow and the soil isn’t disturbed during the growing season.

Once transplanted in the garden, make sure they receive consistent moisture, offering about an inch of watering per week, including rainfall. Mulch the soil to keep the weeds down and retain soil moisture.

Fertilize twice during the growing season using a balanced formula. Sidedress the plants with fertilizer once when the fruits are about an inch in diameter and a second time two weeks later.

Harvest

After a successful eggplant gardening season, you can look forward to an impressive harvest. Here’s how to pick eggplant:

  • Depending on the variety, eggplant takes about 65 to 80 days to reach maturity after transplanting. Depending on the climate you live in, your eggplant can come to harvest anywhere between July to September. Begin harvesting eggplant when the fruits reach full size and pressing firmly produces a thumbprint that bounces back quickly. Under-ripe eggplants are too hard to take a thumbprint, and overripe ones are so soft that a thumbprint leaves a permanent bruise.
  • Eggplant is best harvested while the fruits are still young. Smaller fruits have a tender flavor and texture. Also, picking the fruits timely promotes the development of new fruits, and your plants will be more productive.
  • To pick eggplant, cut it off the stem with shears or scissors, leaving about an inch of the stem attached. Pulling them off by hand may damage the plant.

Storing

Eggplant doesn’t store well. It’s best eaten fresh. If you can’t use freshly picked eggplant right away, store it in the fridge and use it within a week. Store it without washing or cutting since it quickly spoils if the flesh is exposed.

Eggplant can be pickled if you want to store it for longer. Besides pickling, there aren’t many preservation techniques that will work well for eggplant.

At our home my wife will cut and fry excess eggplant and freeze for future use in eggplant parmesan or rollatini recipes. The fried pieces do store well for several months.

Pests and Diseases

Pests

  • Aphids are tiny soft-bodied insects, often found on the underside of the leaves and stems of the plant. As they feed on the plants, they secrete a sticky substance called honeydew that promotes the growth of dark, sooty mold on the plants, inhibiting their ability to photosynthesize. Hose them off with a strong spray of water, or introduce beneficial insects, such as lacewings and ladybugs, that feed on aphids. Alternatively, you can spray insecticidal soap on the infested plants. 
  • Flea Beetles are a common problem eggplant growers experience, these happen to be the bane of my garden life. They feed on the leaves, leaving small holes on the surface. Their larvae grow in the soil and certain species will eat roots. Established plants can generally tolerate a fair amount of damage by flea beetles without showing any effect on yield, but seedlings are more susceptible to damage. Place row covers over them until they are bigger.
  • Colorado potato beetles feed on the leaves of eggplant, causing significant defoliation and loss of yield if the population builds. You can handpick the adults and larvae and destroy them with soapy water. Chemical control may be necessary for severe infestations.

Diseases

  • Powdery mildew is a fungal disease that can affect eggplant. It appears as powdery, white spots on the leaves, stems, flowers, and fruits. The leaves will turn yellow and twisted and eventually drop. You can prevent the problem by planting resistant varieties and ensuring adequate spacing to allow ample air circulation between the plants.
  • Blossom end rot is a common disease with eggplant gardening, just as it is with tomatoes. It affects ripe fruits and appears as dark sunken spots on the blossom ends of the fruits. Avoid over-fertilizing and over-watering to prevent the problem.
  • Verticillium wilt kills more eggplants than any other disease. Ensure good drainage and warm soil to discourage this soilborne fungus, which causes plants to wilt and eventually collapse, often with yellowing between the leaf veins.
  • Tobacco Mosaic Virus – Young growth is malformed and leaves are mottled with yellow. To prevent it, wash hands after handling tobacco before touching plants. Control aphids, which spread the disease.

Saving Eggplant Seeds

Heirloom eggplants are open pollinating, so saving seeds is easy. Choose over-ripe fruit from strong plants (take seeds from as least 2 different plant). To remove the ripe seeds, cut off the bottom end of the fruit and pick out the seeds. Dry the seeds at room temperature for about two weeks. Under good storage conditions, eggplant seeds will remain viable for five years.

That’s all there is to eggplant gardening. Hope you have a successful eggplant gardening season and enjoy picking loads of homegrown eggplant for your recipes.

Garlic Gardening Made Simple

Garlic Gardening Made Simple

raising healthy plants by reading this blog on garlic gardening

Garlic is often thought of as an herb but botanically it’s a vegetable. Few people think about garlic gardening, sticking instead with the normal garden vegetables like tomatoes and peppers, but it’s an easy-to-grow vegetable that pairs well with many other foods.

Even in the garden garlic pairs wells as a companion plant that provides pest protection and enhances vegetable flavor. Tomatoes, potatoes, carrots, broccoli, and cabbage benefit from having garlic planted near them in the garden and will benefit the second time when paired with fresh garlic in a recipe.

Use these tips to successfully grow garlic in your home garden.

Native Garlic

Garlic, (Allium sativum) is native to Asia but grows as a wild plant in Italy and parts of France. It’s a perennial plant that has an edible bulb with a distinct aroma and flavor. Garlic is a flavor-filled vegetable that has found its way into recipes all across the world and is closely related to the onion and leek.

Everyone knows that eating garlic will leave behind a lingering odor in the mouth but eating it also provides health benefits. Compounds in garlic are said to reduce blood pressure, lower bad cholesterol, stabilize blood sugar, reduce bronchitis symptoms, and provide several other health benefits.

Enhance the flavor of your food while improving your health by adding a little garlic to your meals.

Types Of Garlic

* Soft-necked garlic is the most common type and is typically sold in all supermarkets. The soft-necked type is divided into two categories – artichoke and silverskin.

* Artichoke garlic has multiple layers, like an artichoke, that overlap and will contain 15-20 cloves. This type has a thick, white outer layer and will remain fresh for up to 8-months when stored properly.

Applegate, Polish Red, Early Red Italian, Italian Late, and Galiano are a few of the artichoke garlic varieties.

* Silverskin garlic is the easiest to grow in a home garden and is an abundant-producing variety. Polish White, Chet’s Italian Red, and Kettle River Giant are the most common types of silverskins.

* Hard-necked garlic has large cloves with intense flavor and is easy to peel. The most common types of hard-necked garlic include Chesnok Red, German White, Purple Stripe, Persian Star, and Porcelain.

Because garlic is grown worldwide and each region has developed its’ own strain of garlic, there is not a ‘true’ garlic that will look and taste the same everywhere in the world.  While garlic gardening, experiment with different garlic types in the garden so you can discover which ones grow best in your climate and which ones have the flavor you prefer.

When To Plant Garlic

Garlic cloves are planted in the middle of fall (autumn) when all other garden plants have finished their growing season. Garlic is ‘put to bed’ for the winter because it needs a season of cold temperatures, “stratification” to grow.

Before the soil freezes but after it has cooled down significantly, is the ideal time to plant garlic. The cloves will need 3-6 weeks before the soil freezes to develop a root system.

Sun and Soil Requirements

Garlic prefers a spot in the sun so select a growing location that will be in full sun. There are no leaves in late autumn on most of the trees to block the sun but bear in mind the sun’s patterns changes during the winter and a sunny summer location might now be in full sun during the winter.

Well-draining soil that is fertile and crumbly is best for garlic gardening. Incorporating plenty of compost into the soil before planting will provide nutrients to the garlic, promote good drainage, and help keep the soil from compacting during the winter.

How To Plant Garlic

Garlic gardening

Each garlic plant is comprised of multiple cloves. You want to plant individual cloves so gently break apart the garlic bulb into separate cloves and place the root-side of each clove facing down in the planting row, when they grow, they will form new bulbs. Plant the cloves in mid-fall when the soil is still slightly warm. Create rows that are 12-inches apart and 2-inches deep. Space the cloves 6-inches apart.

Place 1-inch of soil on top of the cloves followed by 1-inch of mulch. Water thoroughly.

Leave the garlic alone during the winter and as soon as the soil warms up in spring the cloves will begin to grow green tops that resemble the top of an onion.

Now a garlic gardening tip, as the garlic grows, it will send out stalks that will have flower heads. These are called scapes. Let these grow for a bit. They can become quite beautiful. Often times these flower stalks wrap around. As they begin wrapping, cut the scapes off. If you leave them on the energy will go to the flower – you want all energy at this point directed at growing the bulbs. The scapes are quite edible.

Harvesting Garlic

When the lower leaves of the green stalk begin to turn brown the garlic bulb is ready to harvest.

To test for ripeness, dig up just one bulb to see if it has filled out its’ skin. Bulbs harvested when the skin appears to be baggy will result in smaller garlic bulbs and a milder flavor.

Use a shovel to dig down 4-inches behind the stalk, then lift up on the shovel to remove soil and bulb together. Do not pull up by the stalk. Gently brush the soil from the garlic bulb but do not wash before storing.

Storing Garlic

Lay freshly harvested garlic on a table in a single layer in a dry, dark location that has plenty of air circulation for 7-days. This will allow the skin to dry and begin to toughen. After the initial 7-days, the bulbs will need to be stored long-term in a cool, dry, dark location that has plenty of air circulation.

Light and moisture will promote the development of mold on the harvested bulbs. Keep them in the dark, keep them dry, and keep the air circulating around them.

Pests and Diseases

Pests

Bulb mites, leafminers, thrips, onion maggots, and nematodes are pests that enjoy eating garlic bulbs. Create a tea of 1-teaspoon of crushed red pepper flakes and 1-cup of hot water. After the water cools, pour it onto the soil around the garlic to repel most of the pests that attack the bulbs.

Diseases
The plants are susceptible to several diseases, including White Rot, Basal Rot, Rust, Penicillian Decay, and Downy Mildew. Certain disease can be treated and stopped by removing the affected leaves, however, more serious diseases like White Rot will require the garlic plant to be removed from the soil and burned. The soil will need to be removed to prevent the spread of the diseases also.

Tomatillo Gardening

Tomatillo Gardening

Tomatillo Gardening  is a warm season vegetable that’s planted outdoors once all dangers of frost have passed in spring,

Tomatillo (Physalis ixocarpa), or Mexican husk tomato, are members of the nightshade family, grown for their small, green or purple fruits. The fruits closely resemble unripe tomatoes in their appearance with a leafy husk that wraps the outside, hence the name. Tomatillos originated in Mexico and are a staple of Mexican cuisine to this day. They are consumed raw or added to soups, sauces, salsa, and jam. It’s a perennial plant in southern climates, usually grown as an annual vegetable that grows up to 3.3 feet tall. Tomatillo thrives in warm climates and are very sensitive to frost.

Types & Varieties of Tomatillo

Tomatillo is an excellent source of fiber. It’s rich in Vitamin C, Vitamin K and niacin. Several different varieties exist, with some differences in the size and flavor of the fruit. Some types give green or yellow colored fruits while some are purple.

Common varieties of Tomatillo:

  • Cisineros It’s a very productive variety that matures in 85 days and produces large green fruits, up to 2.5 inches in diameter. They have a sweet, fruity flavor and work great in salsa and sauces.
  • Pineapple – It’s a unique variety that produces loads of small, yellow fruits, about an inch in diameter. The fruits are green to begin with but turn yellow as they reach maturity, in about 75 days from planting. It’s sweet, pineapple flavor is where its name comes from.
  • Amarylla – This is an heirloom variety with sweet yellow fruits that reach maturity as the husks split open. The firm, small fruits are perfect for jams, and salsa.
  • Toma Verde – Maturing in 60 to 70 days, it takes little time to grow, producing abundant, large green fruits. The fruits are very sweet, and work great in sauces and salsa.  

Each plant produces 1 to 2 pounds of fruit so plan around 1 to 2 plants per person, spacing them 3 to 4 feet apart in rows with a 3-foot spacing between rows.

Temperature and Timing for growing Tomatillo

Tomatillo is a warm season vegetable that’s planted outdoors once all dangers of frost have passed in spring, and the temperatures are consistently above 50°F. You may start the seeds earlier indoors, 6 to 8 weeks before the last frost and transplant the seedlings once the frost has passed and the soil is warm. The vegetable plant thrives when temperatures are between 70°F and 80°F.  

Sun Exposure and Soil Requirements

Tomatillo requires a spot with full sun to thrive and produce abundant, healthy fruits. For best growth, it needs to get 8 or more hours of direct sunlight.

Well-drained, moderately fertile land is best for tomatillos, but since they’re hardy plants, they’ll also survive in low fertility.

How to Plant Tomatillo

Tomatillo gardening begins with planting the seeds indoors, 6 to 8 weeks before the last expected frost of spring. Staring the seeds indoors is especially important in regions where summers are shorter, since the plants will need at least two months to grow to maturity after being transplanted in the garden.

It’s important to know that you’ll need at least 2 tomatillo plants for pollination and fruit set. Since they are not self-fertilizing, individual plants will not be able to fertilize themselves. Plant the seeds in seedling trays filled with light potting soil and allow them to grow besides a sunny window before they’re ready to go in the garden.

Once the outdoor temperature stays consistently above 50°F, you can start hardening off the seedlings. Give plenty of time to adapt to the outdoor conditions before setting them in the prepared garden bed. Space them at least 3 to 4 feet apart since they have a bushy growth, with 18 to 24 inch spread.

Just like tomatoes, the seedlings are planted deeply since roots appear along the stems. Set some form of support, such as a trellis or a tomato cage to keep the plants off the ground. Mulch the soil with 2 to 3 inches of organic matter to keep weeds at bay and preserve soil moisture.

Offer about an inch of water each week. Since tomatillos are light feeders, they won’t need any fertilization if you planted them in organic soil amended with some compost to begin with.  

Harvest

Tomatillos take around 75 to 100 days to grow to maturity. Here’s how to harvest them.

  • Harvesting begins when the fruits fill out the husks and the papery husks start splitting open.
  • Sometimes, the husk won’t split open but will turn brown and leathery, this is also a sign that they’re ready to be picked.
  • Harvest them while they’re still firm. Don’t wait until the fruit turns pale yellow since they’ll be seedier and will lose their characteristic tanginess.
  • Remove the fruits by cutting the stem with sharp pruners. Avoid pulling the fruits as it may damage the plant.

Storing

If you plan on storing them, don’t remove the husk before refrigerating them. At room temperature, tomatillos will stay fresh for up to a week, while in the fridge, they can last for up to 3 weeks. Either place them loose or inside a paper bag. Don’t store them in plastic. You can also freeze whole or sliced tomatillos to save them for longer. Canning or preserving in the form of sauces or jam is another way to use your harvest through the rest of the year. 

Pests and Diseases

Pests

  • Aphids sometimes bother your tomatillos, sucking the sap from the plants. In small numbers, they aren’t too problematic but too many can cause stunted growth. You can hose them off with water or spray the plants with insecticidal soap.
  • Cucumber beetles, with yellow and black stripes on their back, live on the underside of the leaves, eating away the leaves and weakening the plants. Use floating row covers to protect newly planted seedlings. 
  • Potato beetles are orange-yellow, with three black lines on the back and are a common problem with tomatillo crops. If there are only a few of them, handpicking is enough to eliminate the pests. However, on a heavily infested crop, you may use chemical pesticides – but be careful when using pesticide while tomatillo gardening.

Diseases

  • Anthracnose is a fungal disease that attacks the fruits as it ripens. It begins as a small, sunken spot and grows into a large, black lesion. Eventually, the fruit will rot. The disease is often the result of very hot and humid conditions
  • Bacterial Leaf Spot damages the leaves and the fruits on the plant. It appears as translucent spots that grow bigger with a red center. The disease thrives in cooler climates.

Hopefully, this article will help you with your tomatillo gardening to grow the best tomatillos to feed your Mexican cravings – wish you a great gardening experience!

Brussels Sprouts Gardening

Brussels Sprouts Gardening

Brussels sprouts, Brassica oleracea, are a unique type of cabbage belonging to the Brassicaceae family. Though the vegetable is native to the Mediterranean region like other cabbages, they’re named after Brussels, a city in Belgium, where they have been popular since the 13th century. Brussel sprouts are rich in nutrients, primarily antioxidants, fibers, and Vitamin K. Something you need to know about brussels sprouts gardening is they are an annual cool-weather crop that grows up to 2 to 3 feet in height, forming numerous miniature cabbage heads along thick stalks. They’re planted in late summers, taking about 80 days from transplant to reach maturity and be harvested in late fall or early winter. Brussel sprouts taste best when they’re harvested after being subject to light frost.

Types & Varieties of Brussels Sprout

Different Brussels sprout varieties exist, with subtle differences in the sizes and number of buds attached to the stalks and also their color and flavor. Several tiny buds are attached close to each other in some varieties, while others have bigger buds with some spacing between them. Colors range from pale green to reddish-purple. 

Common varieties of Brussels Sprouts:

  • CatskillIt’s an heirloom variety, introduced in 1941. It produces 2” round, deep green sprouts attached to long, strong stalks. It takes between 85 to 110 days to grow to maturity.
  • Dagan – The variety produces bright green sprouts that hold their shape well at harvesting. They grow tall stalks with medium to large sprouts, taking about 100 days to reach maturity.
  • Green Gems – These varieties grow to about 34-36” tall, packed with beautiful 1.5” sprouts. The mini cabbages have a golden interior and reach maturity in just over 85 days.
  • Churchill – It’s a fast-growing hybrid that produces flavorful, green sprouts in as little as 90 days. 

If you’re building a vegetable garden for self-sustenance, plan around 2 to 8 Brussels sprout plants per person, and since the individual plants are spaced at least 16” apart, plant around 8 to 10 feet per person.

Temperature and Timing for growing Brussels Sprout

Brussels sprouts are cool-season vegetables that grow best at temperatures between 45 and 75°F. In warmer climates, they’re planted in late summers for a winter harvest, while in cooler climates, they’re planted in early summers to be harvested in the fall. They can tolerate below-freezing temperatures for a couple of days. In fact, the flavor is enhanced when they’re subject to light frost.

Sun Exposure and Soil Requirements

Full sun, with exposure for at least 6 hours a day is best for Brussels sprouts gardening. They prefer growing in fertile, well-drained soil that’s amended with plenty of organic matter. Make sure the soil pH is between 6.5 to 7.

How to Plant Brussels Sprout

Brussels sprout gardening begins by planting the seeds ½ to ¼ inch deep in pots or seedling trays 12 to 14 weeks before autumn’s first frost. Plant 2 to 3 seeds in each module and maintain moisture in the soil. The seeds will sprout in 7 to 12 days. After the seedlings appear, remove the weaker ones, keeping the strongest ones to develop further. Once the seedlings are 4 weeks old, they are ready to be transplanted into the garden.

When it’s time to transplant them in the garden, harden off the plants by setting out the seedling tray in a shady spot outdoors, bringing them back inside for the night. Increase the sun exposure gradually until they’re ready to be planted in the garden bed in about a week.

Set the transplants 16 to 18″ apart in rows that are spaced 30 inches apart. Remember to firm the soil around the seedlings, so they’re well-anchored to the ground as they develop into mature plants.

Brussels like their soil evenly moist. Offer about 1 inch of water each week, watering at the base of the plant. Overwatering can result in stunted growth and root rot, so be careful in providing just the right level of moisture. 

Fertilize the soil once before setting the transplants and a second time at mid-season. For fertilizing the sprouts, you can either side-dress the plants with aged compost or use a balanced organic fertilizer, such as 5-5-5.

Stake the plants since they’ll become top-heavy as the buds start developing. If there isn’t a stake for support, the plants will lean over or fall.

Harvest

Once your Brussels sprout gardening goes successfully, there will be loads of sprouts to harvest at the end of the season. Here’s how you harvest sprouts:

  • As the crop approaches harvest, the leaves near the buds start turning yellow. It takes about 3 to 4 months for the buds to come to harvest from the time of transplanting. Once the buds are about 1.5 inches in diameter and still firm, it’s time to harvest them.
  • Near the end of the growing season, remove the lower leaves to allow more room for the development of the buds.
  • The lower buds mature first; puck them before they turn yellow. Yellow buds are bitter. Harvest the upper bulbs as they develop. If you want all the sprouts to come to harvest at the same time, pinch out the growing tip.
  • If a drastic temperature drop or rise is predicted in the coming days as the plant approaches harvest, you can harvest the entire stalk. The stalk is also edible once the tough outer layer is removed. 

Storing

When stored unwashed in a plastic bag, Brussels sprouts will stay fresh in the fridge for over 3 to 4 weeks. Remove the loose, yellow outer leaves from the buds before storing them. Blanched sprouts can be frozen and used for up to 4 months.

Pests and Diseases

Pests

  • Aphids are a common problem with Brussels sprouts. These insects collect on the stems and weaken the plants by sucking the sap from them. You can hose them off with water.
  • Cabbage loopers and cabbage worms also attack Brussels sprouts. You can either handpick and kill them or spray the plants with Bacillus thuringiensis.
  • Cutworms often come out at night to feed on the plants. Place cutworm collars around the plants at the beginning of the growing season to protect the young plants.

Diseases

  • Brussels is susceptible to cabbage yellows. This is a fungal disease that begins at the lower buds, turning them yellow and then progressing to the higher buds. Plant resistant varieties and apply compost tea regularly to prevent the disease.
  • Clubroot is another fungal disease that affects Brussels sprouts. They result in the swelling of roots and weakening and wilting of the plants. Maintaining a neutral soil pH and an adequate supply of calcium and magnesium can help control the disease.

Follow this guide, and you’ll hopefully grow lots of crunchy, flavorful Brussels sprouts to grace your dishes.

Radish gardening

Radish Gardening

Radish gardening is simple. They are among the fastest growing vegetables in the garden. These roots have a spicy, peppery flavor and the greens are super nutritious and delicious. Planting can be as easy as dropping seeds among slower growing vegetables like carrots or broccoli or cabbage – the radishes germinate and identify the row before the slower growing plants emerge.

The crunchy spring variety includes:

Cherry Bomb – maturity in 22 days

Crimson Giant – maturity in 30 days

Burpee White – maturity in 25 days

French Breakfast – maturity in 26 days

Early Scarlet Globe – maturity in 26 days

Organic Sparkler – maturity in 26 days

Where to Plant

Choose a site that gets at least six hours of sun a day. Spring radishes are not a finicky root vegetable. They do like full sun when the weather is cool yet will handle some shade when it’s warmer.

Because they are quick to sprout, simply sow them in any empty spaces in a bed.

Planting

Radish gardening - do not plant the seeds too deep

Since radishes like it cool and they grow fast, they are not candidates for starting in flats and transplanting. As soon as the garden’s soil is workable in the spring, you can plant a first sowing. Plant additional rows through early May for your spring crop. Autumn planting can begin again August 1 through September 1 for harvests into October and November.

Till the soil to a depth of at least eight inches, then make furrows about six inches apart and plant the seeds at a depth of about 1/2 inch and cover loosely with soil or peat moss (anything that will not clump up and make it difficult for the seeds to sprout). Allow about one inch between seeds in the row then thin to 2 inches as they mature.

Do not cultivate too deeply or you may damage the roots. Use a hand tool or a hoe and cultivate just deeply enough to cut the weeds off below the surface.

Sunlight and Soil Requirements

As previously stated, choose a site that gets at least six hours of sun a day. For the best radishes, plant them in a friable soil when the weather is cool and provide constant moisture. Any well-drained, slightly acidic to neutral soil with pH 6 to 7 will do for radishes. An overly rich soil will encourage lush foliage at the expense of crisp, tasty roots. If the soil is too dry, radishes may bolt and become pithy and too pungent to eat. If too wet, the roots will split and rot.

Succession Planting

Make small weekly sowings, trying different varieties to obtain a wide mix of radishes. Because most spring varieties mature in less than a month, succession plantings ensure a steady supply of radishes. When warm weather (65 degrees or higher) arrives, stop sowing as radishes will not tolerate heat and will rapidly go to seed. However, in late summer, you can start planting again for an Autumn harvest.  

Harvesting

Although radishes are easy to grow, when radish gardening knowing to harvest is the key to perfect radishes with crisp roots and mild flavor instead of hot as fire and as pithy as corks. Garden radishes are usually ready for harvest three to five weeks after planting. You can pull them any time they reach a usable size. They will get fibrous and develop a strong taste if left in the ground too long. Remove greens and wash roots well.

Problems

The worst invader of the radish patch is the root maggot. Luckily, this pest is easily avoided with a proper crop rotation. Never plant radishes in a bed that contained a cole crop in the last three years. If you incorporate some wood ashes in the soil, the maggots shouldn’t present a problem.

Flea beetles make tiny holes in the leaves, slugs and snails chew grooves in perfect roots, and a sudden deluge can cause radishes to split and start rotting.