Category Archives: Bee Keeping

Information for the beekeeper

you want to be a beekeeper

You want to be a beekeeper

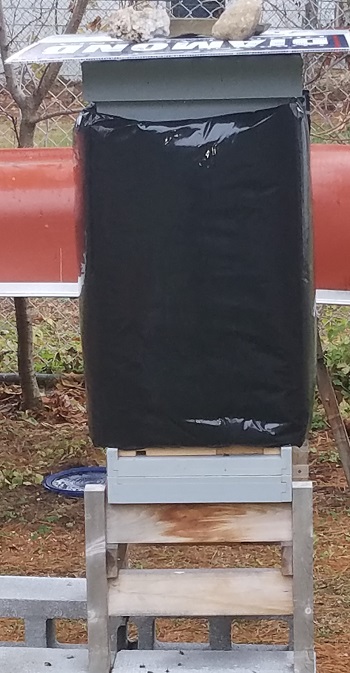
So you want to be a beekeeper, after all honey is healthy, bees are dying for all sorts of reasons and need a champion like you. There is a store right done the street that sells the equipment you will need and Facebook Marketplace has sellers that “can hook you up with bees”. The stars are aligned, everything you need is at hand, just set up the store bought hive, pick up the bees from Facebook guy and … free honey!! The ultimate impulse buy, 25,000 flying insects that can sting. If this is your game plan, you will probably do more harm than good. You may get your “free honey” after spending close to $500.00 for equipment and bees but without working the bees and caring for them you may create a parasite/pathogen vector that will infect not only other beekeepers’ bees but also wild bees and worse of all, your hive will probably die.

so you want to be a beekeeper - learn all about it
Queen supersedure cells to replace a failing queen

Ok, that’s about as negative as I can make it and that was close to my failure except I can add that I read books about beekeeping, went to seminars, asked questions at the bee store and knew the beekeeping buzz words. I got honey and my bees died. With that loss I jumped into what I missed. I joined a local bee club and spoke with an experienced beekeeper about helping me get better. With that conversation I found a mentor who became a friend.

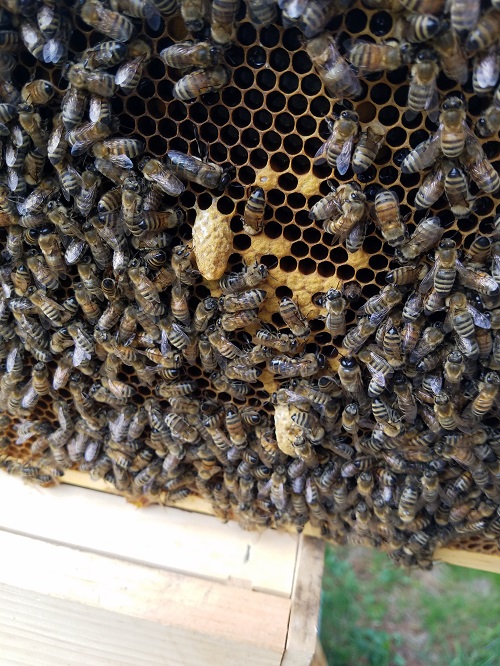
The mentor, and a great one at that, was the key. One summer and autumn of helping him work bees and he coming to my apiary and instructing me on things to watch and present ideas of what to do in addition to what I was doing made all the difference. The biggest lesson learned was the dedication necessary to the bees. If you want to be a beekeeper, you cannot plop them down, look two times during the year and expect success. After setting up your hives comes the work (and dedication). You should try to open your hive at least once every other week. Know what you are looking at, learn to take time and know every once in a while you will get stung. You will need to take the time and check for small hive beetles, ants, wax moths and other not very nice insects. You will want to know how to check for varroa mites and make the time to do it. You will need to know how to use medications, when to use them and when not to use them. You will need to know how to set the hive (s) up for winter and how to open in the spring. I can go on with more, but you should get the picture now.

With all the work and dedication comes the good. 50 lbs. – 100 lbs. (4 to 9 gallons) of honey per year per hive if all goes well (year 1 expect very little). What we harvest we use – our kids take home a gallon or so each, neighbors and friends are spoiled. With the honey comes bees wax for soap, lip balm, candles, etc. I find joy in sitting and watching the bees doing what bees do. My flowers and vegetables get pollinated. It is amazing to witness a “super-organism” at work. A queen laying eggs, workers feeding larvae, bees hatching, a scout bee coming back to the hive to perform the “waggle dance” are the best shows in town to watch. You may open a hive and see queen cells – are they supersedure cells? Are they swarm cells? I find it very rewarding keeping bees and trying to do it well. So…you want to be a beekeeper…

Winter Bee Hive Prep

It’s mid-October, Winter is right around the corner and now is time to start your winter bee hive prep. The following is a list of winter hive preparation to-do’s.

winter beehive prep includes setting the hive up to minimize drafts and provide added insulation
  1. In the Northeast, frosts have come, the goldenrod is almost done and most flowers are long gone. You may want to install feeders on your hives for as long as the bees will work them. I use entrance feeders for the hives. For me they are easy to clean and refill. An added extra is there is minimal hive disturbance. There are also internal hive top or frame feeders as well as pail feeders that can be used. A fall syrup recipe is (by weight) 2 lbs sugar to 1 lb water. For those without a scale, mix 2 cups of water to 4 cups of sugar.

    Check your hives to make sure there is plenty of honey available. Winters can last from December into April, so the bees will need food for up to 5 months. As a standard guess, bees need about 50 lbs – 70 lbs of honey for winter food. That equates to approximately 10 – 12 deep frames fully loaded.

    When winter rears its head, stop feeding sugar syrup as the bees will not be able to take cleansing flights. Entrance feeders will need to be removed. If you want, a “candy board” can be added to the hive as “safety” stock.

  2. Remove the queen excluder. The bees will move up and down the entire hive in the winter. If the the queen excluder is left in place the queen will be trapped underneath. If the cluster needs to move up past the excluder to access winter honey, You could lose the queen and ultimately the hive.

  3. Make sure to keep up varroa treatment. Apivar strips can be left in during the winter. Formic acid treatment or oxalic acid can be used as temperature dictates. Keep performing varroa checks until the temperature is too cold. Check for small hive beetles – if you spot some make sure to locate some traps around the frames.

  4. A beekeeping friend is a firm believer in insulated hives in winter. He has been a beekeeper for over 60 years so I trust him. In fact, he is a BeeMax Polystyrene Hive advocate, I however, use a wood hive with screen boards over bottom boards. I have closed the spaces between the screen and bottom board with foam secured in to make a tight fit. The goal is to close any unwanted drafts.

  5. When the hive feeders are removed, install the entrance reducers with the smaller notch facing upwards. I am trying it this way for the first time in 2020 based on advice from the local bee supply store. As I was told, “Turning the entrance reducer so the opening faces upward will help keep the entrance open even if there are lots of dead bees on the floor of the hive”.

  6. When the entrance reducers are installed, put the mouse guards on. Again, as told, “As the bees start to cluster together, they pull away from guarding the entrance, mice can slip inside and make a mess, chewing on combs and relieving themselves”.

  7. Place a 1” thick piece of foam board on top of the inner cover fitted to sit in the telescoping cover. The cover will help keep the interior of the hive warmer and drier. I have been told that the insulation can stay year-round, as it will keep the hive warmer in winter and cooler in the summer.

  8. A candy board can be installed just below the inner cover for supplemental feeding. Spaces will be left for the bees to move up and use the telescoping cover to come and go. It will also allow moisture to exit the hive.

  9. Place bricks on top of the outer cover to keep it on should winter winds be strong. Last thing you want is for the outer cover to be blown off.

  10. My friend is a firm believer in insulation. As I have wood hives, I will cover each hive with EZ-On Hive Wrap, it is supposed to provide R-4 insulation properties. Last year I tried wrapping in foam insulation and frankly it was a pain to cut to size, tape the ends and tape to the hives. Hopefully, the EZ-On gives the bees an extra edge in the cold region I live in

  11. Last but not least, tip the hive slightly forward to allow any free moisture to drain out. An issue for winter bee hive prep is to make sure the hive stays dry. Moisture can be as dangerous as cold – correct air flow will help along with insulation.

Hopefully the bees will come through the winter strong and ready for a new year of…being bees!!